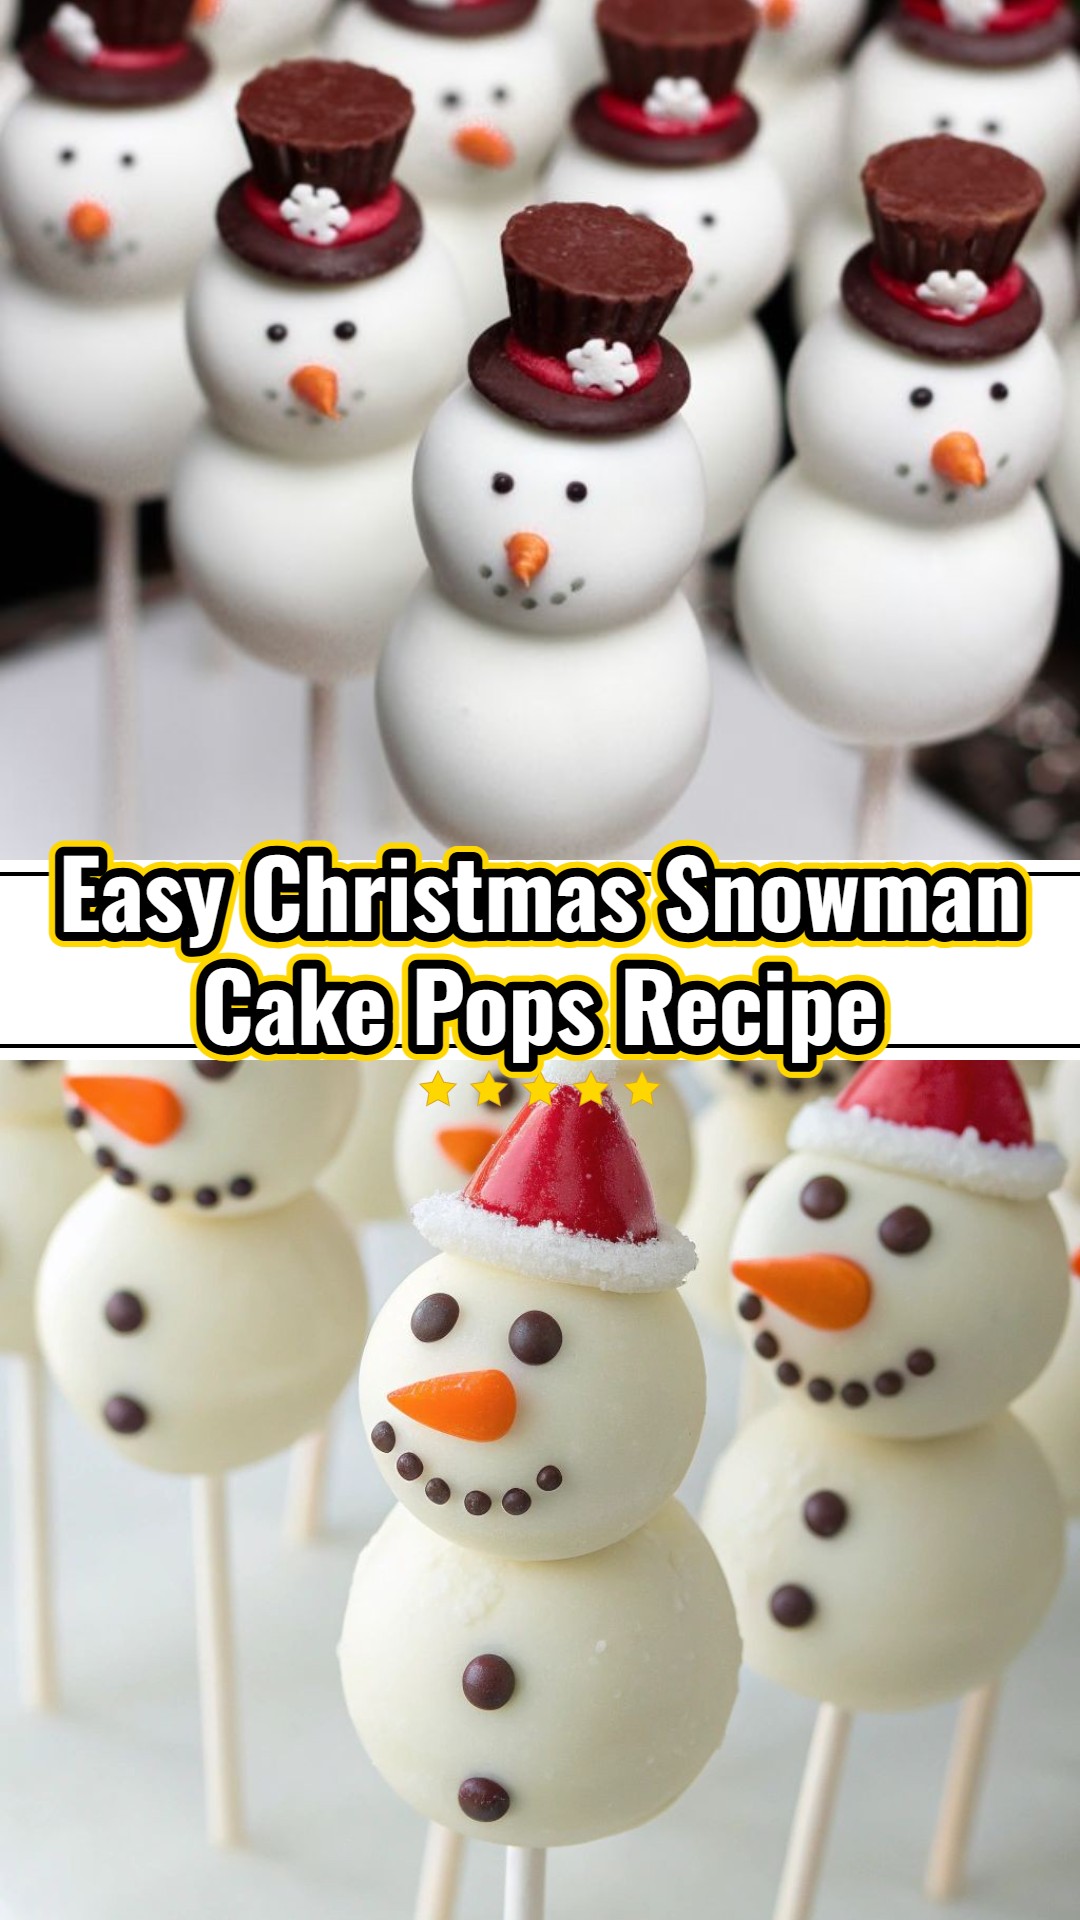
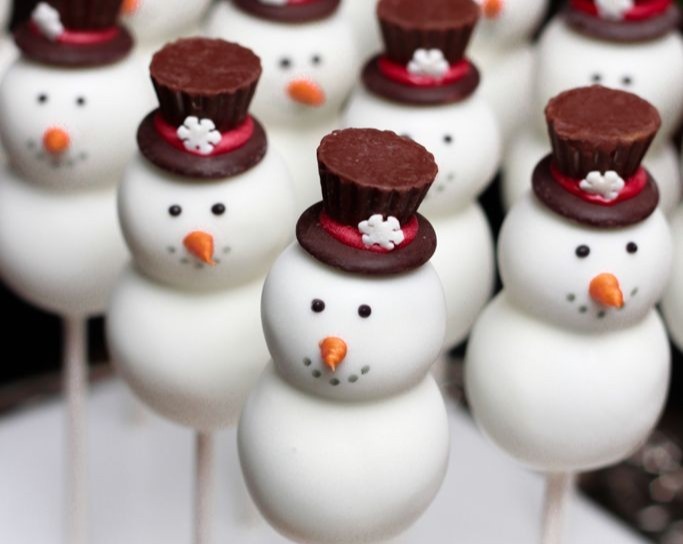
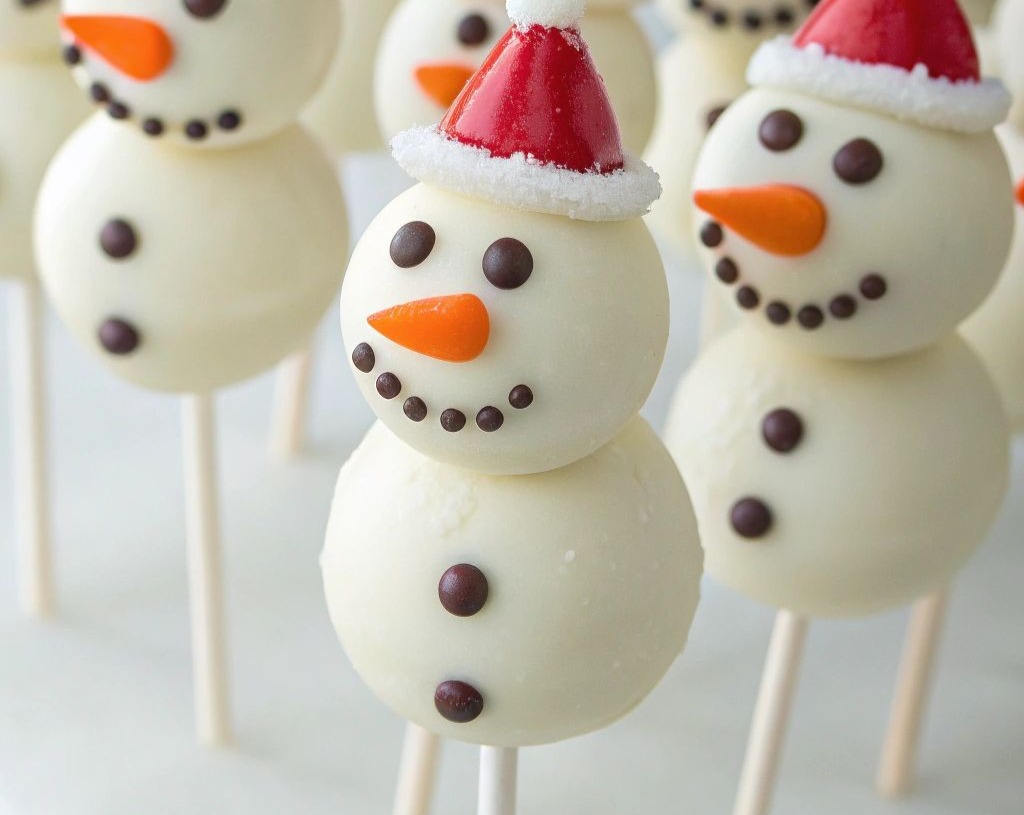
As the festive season twinkles into full swing, our kitchens become the heart of holiday magic. If you’re searching for a treat that’s as delightful to look at as it is to eat, then these Christmas Snowman Cake Pops are calling your name! They offer a perfect blend of nostalgic charm and irresistible sweetness, making them an ideal project for family fun or a standout dessert for any celebration. Imagine the delight as guests discover these adorable edible snowmen, each one a miniature work of art handcrafted with love. They’re surprisingly simple to create, allowing even novice bakers to achieve stunning results. These cake pops are more than just a dessert; they are a cherished memory waiting to be made, bringing smiles and festive cheer to every bite. Let’s dive into creating these whimsical wonders that will surely become a new holiday tradition!
Helpful Tips
- Chilling is Key: For perfectly smooth, crack-free cake pops, ensure your cake balls are thoroughly chilled—ideally in the refrigerator for at least 30 minutes, or the freezer for 15 minutes. This firm base prevents them from crumbling or falling off the stick during dipping and helps the candy coating set rapidly and evenly, resulting in a professional finish.
- Achieving the Right Cake Ball Consistency: When combining the crumbled cake with frosting, use a light hand. Mix until the mixture just comes together and can be rolled into a cohesive ball without feeling greasy or overly sticky. Too much frosting can make the cake pops dense and difficult to coat, while too little will make them crumbly. Aim for a Play-Doh-like texture.
- Perfecting Your Candy Melts: The consistency of your melted candy is crucial. If it’s too thick, your coating will be clumpy and hard to work with. Stir in a teaspoon of coconut oil or vegetable shortening at a time, warming briefly between additions, until the candy melts are smooth, fluid, and easily coat a spoon without heavy drips. This ensures a thin, even layer on your cake pops.
- Embrace Creative Decoration: This is where the fun truly begins! While classic snowmen are charming, don’t hesitate to personalize. Use edible markers for intricate details, different colored candy melts for scarves or hats, or various sprinkles to add sparkle. Consider using edible glitter or even small pretzel sticks for arms to give them extra character.
- Flavorful Twists: Beyond vanilla, consider using a chocolate cake base for a rich, deep flavor profile. For an extra festive kick, add a few drops of peppermint extract to either the cake mix or the frosting. You could also mix in finely chopped nuts or mini chocolate chips into the cake ball mixture before rolling for added texture and flavor surprises.
Ingredients
- 1 box (15.25 oz) vanilla or white cake mix (plus ingredients required on box: eggs, oil, water)
- 1 can (16 oz) cream cheese frosting (or your favorite buttercream)
- 24 oz white candy melts
…and more!
Easy Christmas Snowman Cake Pops Fun Holiday Baking
These charming Christmas Snowman Cake Pops are a simple, festive treat, bringing whimsical joy to any holiday gathering with their delightful design.
Ingredients
- 1 box (15.25 oz) vanilla or white cake mix (plus ingredients required on box: eggs, oil, water)
- 1 can (16 oz) cream cheese frosting (or your favorite buttercream)
- 24 oz white candy melts
- 2 tbsp coconut oil or shortening (optional, for thinning candy melts)
- Mini chocolate chips (for eyes and buttons)
- Orange sprinkles or small orange candies (for noses)
- Red licorice laces or thin red candies (for scarves)
- Various sprinkles (for hats or extra decoration)
Step-by-Step Instructions : . . .
To Complete Step By Step Instructions Please Head On Over To Next Page Or Open button (>)